Monday, October 31, 2011

Harlem Meer Pumpkin Sail {Halloween in NYC}

I love this city.  

Last Sunday we attended the annual Pumpkin Sail at the Harlem Meer in Central Park. Most free events in NYC always seem to be really crowded and overwhelming, but this one wasn't.  We showed up early to check out the pumpkins up close, and then walked to the other side of the meer to sit up on the huge black boulders and watch from the other side.  "Meer" is the Dutch word for "small sea."  My daughter thinks it's the Harlem mirror, which I guess is right in its own way too :)

The sailing began just after dusk.  It was a beautiful sight.  There were 50 lighted pumpkins strung together and pulled by a spooky witch in a kayak.   Unfortunately, the last half of the pumpkins got detached and were left to float in the middle of the meer. It was very sad for those little pumpkins, and the little kids were really worried about those stranded pumpkins.  

Put this on your to-do list for next year, New Yorkers.


Friday, October 28, 2011

Happy Halloween Decor {Kid-Friendly Crafts Too}

I like to focus on the "Happy" aspect of Happy Halloween.  Not only because I have kids, but because I am just about the biggest scaredy-cat around when it comes to anything scary or creepy.  Obviously I'm fearless since I'm a New Yorker, and I love heights (and jumping from them), roller coasters, and daring adventures.  But I'm really affected by scary movies and music, and since I already have an incredibly vivid imagination, I don't need any other reasons to make myself nervous.  My poor husband LOVES scary movies, but I won't allow him to watch them while I'm present.  Ridiculous, right?

Anyway, you can definitely see how that translates with regards to our Halloween decor.  No bloody daggers, big nasty spiders, eyeballs in jars, or otherwise creepy images that might cause my children to be afraid in their own home.  Maybe as my children get older, I'll get braver too.  For now, I'll stick with the cutesy stuff. Orange twinkle-lights, homemade Halloween decorations, frosted sugar cookies, you get the picture.

We made pumpkin garlands from foam pumpkins we got 20 for $1 at Target, and 10 sparkly ones for $1.  I had Ella draw faces on the jack-o-lanterns, and my favorite is the sad pumpkin who is crying.  I did a simple running stitch to link them all together. I made one with all of Ella's pumpkins, and one with alternating plain and sparkly pumpkins.    We also bought some expandable crepe paper globes for $2 and $2.50 from Target, and I pulled out my Christmas advent calendar to use for Halloween.  I filled it with little pumpkins, dum-dum ghosts, battery-powered votive candles that flicker (awesome!), and little cards that Ella drew with jack-o-lantern faces.  This is by far the "scariest" display I've ever made, but it looks a lot happier in person. You'll just have to come see for yourself :)

I used two sets of these fabulous OTI candlesticks in both large and mini, and framed a free Halloween printable from Brejer (download it here in orange or black).

Do you decorate for Halloween?


 Do you see the Statue of Liberty ghost? I love, love, love, Ella's random application of yellow frosting.


Thursday, October 27, 2011

Dum-Dum Ghosts {Easy Halloween Craft}


These are quick, easy, inexpensive, and CUTE.  We used to make these with tissue paper, but I had the thought to try coffee filters and they are perfect!  It's nice to get an original idea (at least original to me) that works from time-to-time.

We made a little assembly line and whipped out about 30 of these in no time.  All you need is:

Standard-size coffee filters (usually $2 or less for about 100 filters- they are also amazing for making paper snowflakes)
Dum-Dum suckers
Baker's twine, ribbon, or string

Simply place the Dum-Dum sucker on the center of the coffee filter, fold the coffee filter around the sucker, and tie a string around it.  I started out using Blo-Pops, but they are actually too big. Coffee filters make the perfect "skirt" for the Dum-Dums, and they can even stand up on their own. 

I let Ella go crazy coloring the ghosts with magic markers, and then we upcycled a mayonaisse jar to create a cute, portable, unbreakable means of transporting them to her preschool.  A little paint, a cute haunted house sticker, wrapped it with baker's twine and voila.  Perfect.  We are giving these out to trick-or-treaters this year too.


These are my most favorite "happy ghosts" that my daughter made


All packed up for preschool (plastic mayo jar with painted lid)


and look how cute they look all lit up by candlelight in our Halloween display in our entry (Halloween decor post coming up soon!):

Sunday, October 23, 2011

Pier 46 {Charles Street & H. Hudson Parkway, NYC}

Shooting in a new part of the city gets me really, really excited because it helps me see the city from a different perspective.  I met a family here for a session a few weeks back, and it was a place I would probably never have gone otherwise.  It was a beautiful, peaceful, quiet place, and it was fun to see the Empire State Building from a new angle, see the progress on 1 World Trade Center, and it's fun to see sweeping views of the city from the island itself.  Oh, and you can see New Jersey too.  Nothing but love to you, Jersey!  

I live on the Upper West Side and absolutely adore it (and couldn't live without ready access to Central Park), but the more I see of the city, the more I realize how many incredible neighborhoods there are.  The West Village continues to steal pieces of my heart. 

If you live in NYC, why did you choose your neighborhood? And if you don't, if you moved here, where do you see yourself? 


Friday, October 21, 2011

Sugar Crystals With Custom Colors {Hand-Dyed}


I hosted a party last November that I forgot to blog about.  Big shocker, right? If I had a dollar for every event or photo shoot I didn't post about, I'd have enough money for the J.Crew boots I'm currently coveting.  

Anyway.  It was a coloring party, so I used a rainbow color palate for the decor and made my first rainbow cake.  I pulled all my sprinkles from my pantry and realized that I had the entire rainbow, except for yellow. So I decided to try dying clear sugar crystals.  
On my quest to create the perfect shade of golden yellow,  I ended up with about 6 different shades of yellow, and absolutely loved the creative process.   When I compared my gorgeous yellow to my store-bought sprinkles, my heart sunk.  Ugh.  Hideous.

How had I not thought of this before! So I turned back to my clear sugar crystals, and using the base of the yellow, I created green, then used part of the green to make blue, etc.  It was amazing and so much fun to create a rainbow of colors that suited my style better.  Instead of true primaries, my colors ended up a bit more earthy and natural.  You can see a sneak peek of the party with the cupcakes above, but rest assured there will be more rainbow sprinkle goodness when I post the rest of the images.  

The possibilities are endless- try it!
How to:

In a small bowl, mix a small amount of colored dye with the sugar crystals, and then leave them out on wax paper to dry. 

Tips:

  •  A small glass prep bowl and a baby spoon worked perfectly for mixing.
  • The Wilton paste dye works better than liquid dye (you can find it at most craft stores and cake supply stores)   
  • Start small with the dye- even the tiniest drop will go far
  • As mentioned, I started with yellow and worked my way around the rainbow, allowing for custom colors at every step.  If you want true primaries and secondaries, start with pure red, yellow, and blue.  Mix the colors together while the dye is still wet.


p.s. For some reason I always gets bursts of inspiration on Fridays.  I always make time for creative endeavors on the weekend, so perhaps that's why.  This weekend I'm going to try making Panna Cotta with passionfruit sauce and create Jones' Halloween Costume. Wish me luck!


Tuesday, October 18, 2011

2011 Schedule Update

For those of you who are thinking about fall family photo shoots (say that 10 times fast), my 2011 schedule is nearly full.  Contact me asap if you are interested in booking a session.  You can see my pricing here and send me a note here.

2012 promises great things, including a collaboration with Erin of hallmarkink.com to create custom album options for my fabulous clients, and a new website.  It's going to be exciting!

And if you need further proof that the leaves here in Manhattan are beginning to turn, here's proof:

taken on the Upper East Side last weekend.  Our BFF's were visiting, and I'm excited to share some photographs I took while showing them around town!

Fruit Roll-ups {Yum}

I stole these pictures from my sister Stacey's blog because they made me swoon, and they made me hungry.

For those of you with an abundance of fruit, you should definitely try making homemade fruit roll-ups.  It's not exactly easy to procure and transport farm-fresh fruit en masse (on a budget!) here in NYC, especially when you don't have a car... but seeing these gorgeous baker's twine-wrapped fruit rolls and hearing the rave reviews is almost enough to make me want to try.  Almost.


And if you make some, please send some my way...  you can find the recipe HERE

*images taken by the fabulous Stacey and posted with her permission


Tuesday, October 11, 2011

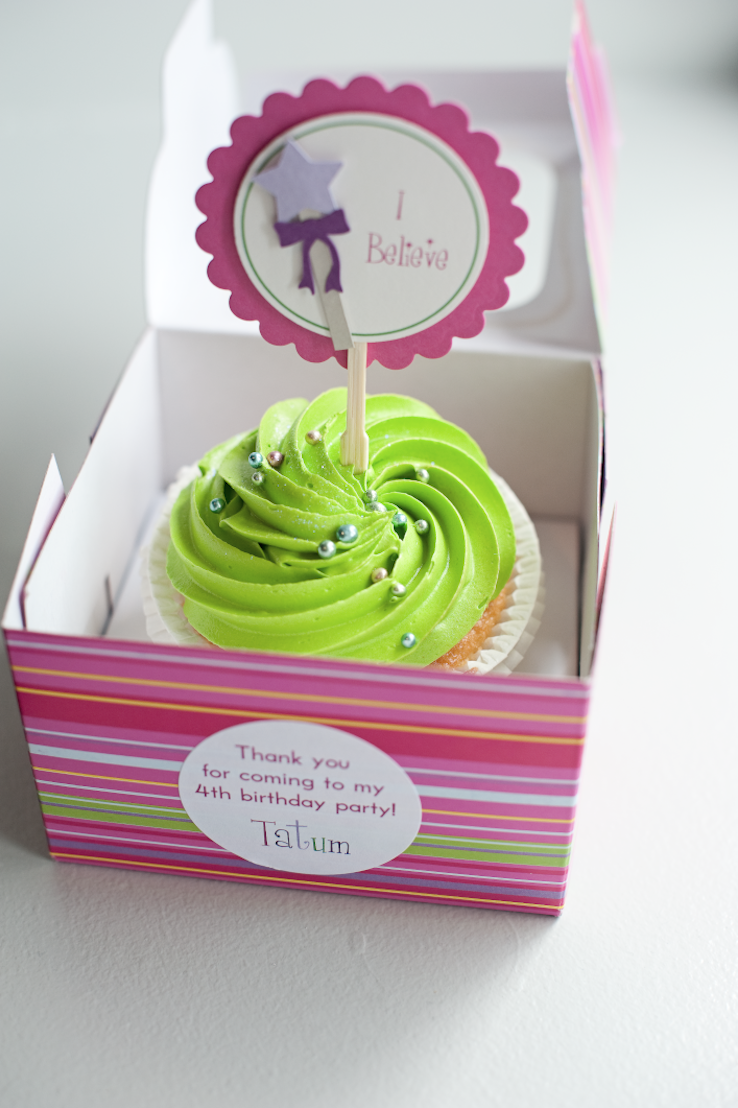
Tatum's 4th Birthday Party {New York City}


P.S.  Can you believe all the details? Amazing, right? 

This incredible birthday party was held at the swanky Soho House in the meatpacking district (one of my favorite parts of the city).  As someone who loves to plan and throw birthday parties, I learned so much while I captured Tatum's special day.  It was really just amazing to watch it all unfold, and see how all the details came perfectly together.  Miss Tatum's amazing mother is a designer, and I am blown away by the all the details she attended to.  I absolutely loved the colorful balloons and decor, the custom banners, the water labels, the custom table decor and cupcake toppers, and the fabulous kid-friendly food.  And oh my goodness, don't even get me started on the cake.  It was out-of-this-world incredible.

Tinkerbell and Skully from A Princess Visit kept the crowd entertained the entire time with an interactive show with magic tricks, music, and lots of laughter.  As you can see, they brought fairy princess and pirate dress-ups for all the children, and Tinkerbell painted faces while Skully worked his magic with balloon art.  It was a truly spectacular event, and the kids were in heaven from the minute they stepped through the door. 


Hiring a photographer for a birthday party or event is such a wise idea because it's impossible to host a fabulous event, entertain your guests, enjoy the event, and document it at the same time.   How many times have you put together a dinner party or birthday celebration and then said "whoops! I forgot to take pictures!"

My mentality is as follows:  what's the point in creating all those amazing details if you don't have someone there to capture them?  Sure, you'll remember with perfect clarity now, but are you really going to remember in 30 years? No way.

When Tatum plans her own 4 year-old's birthday celebration in years to come, she'll be able to look back and see and remember every single detail that her parents so lovingly planned in honor of her big day.  What a wonderful gift.